
I love spending time in the kitchen with my kids, Lily and Jake. Cooking with them isn’t just about food, it’s about laughter, creativity, and making memories. Every Halloween, I like to whip up something fun and a little spooky, and this year it’s Marshmallow Rice Krispies Halloween Brains.
I let the kids help shape the treats, turning simple ingredients into gooey, playful creations. The laughter, the mess, and the excitement make every moment in the kitchen a memory I’ll always cherish.
Why Make This Recipe
Creating Marshmallow Rice Krispies Halloween Brains is more than just a fun cooking project; it’s also a delightful way to spark imagination during the Halloween season. Plus, this recipe is easy enough for children to help with, making it a perfect opportunity for family bonding. Red food coloring adds an extra layer of creativity as kids can decorate these treats and make them as spooky as they like.
The best part? The flavors are comforting, familiar, and perfect for fall. With a combination of rich butter and sweet marshmallows, Rice Krispies bring a delightful crunch to every bite. This treat not only looks adorable but also brings back memories of childhood for many who grew up loving Rice Krispies treats.
How to Make Marshmallow Rice Krispies Halloween Brains
Let’s gather your ingredients and get started on our spooky Rice Krispies Halloween Brains!
Ingredients
- 6 tbsp Unsalted butter (Creates smooth base)
- 6 cups Regular marshmallows (Primary binding agent)
- 4 cups Rice Krispies cereal (Texture foundation)
- 1/2 tsp Salt (Enhances sweetness)
- As needed Red food coloring (Creates brain effect)
Directions
- Set Up Your Bain-Marie: Fill a medium saucepan with ½ cup water and bring it to a gentle boil. Place a heatproof bowl over the saucepan. This will create a bain marie for melting the marshmallows gently.
- Melt the Marshmallows: Add the butter and marshmallows to the bowl. Stir slowly and watch them melt together. Amelia loves this part; the marshmallows puff up, becoming smooth and glossy like magic.
- Add Flavor and Color: Once fully melted, remove the bowl from heat. Whisk in the salt and about 2-3 drops of red food coloring to get that brain-like effect.
- Mix in the Rice Krispies: Pour the melted marshmallow mixture over the Rice Krispies. Amelia urges you to stir quickly to coat the cereal evenly, as the mixture begins to cool down rapidly.
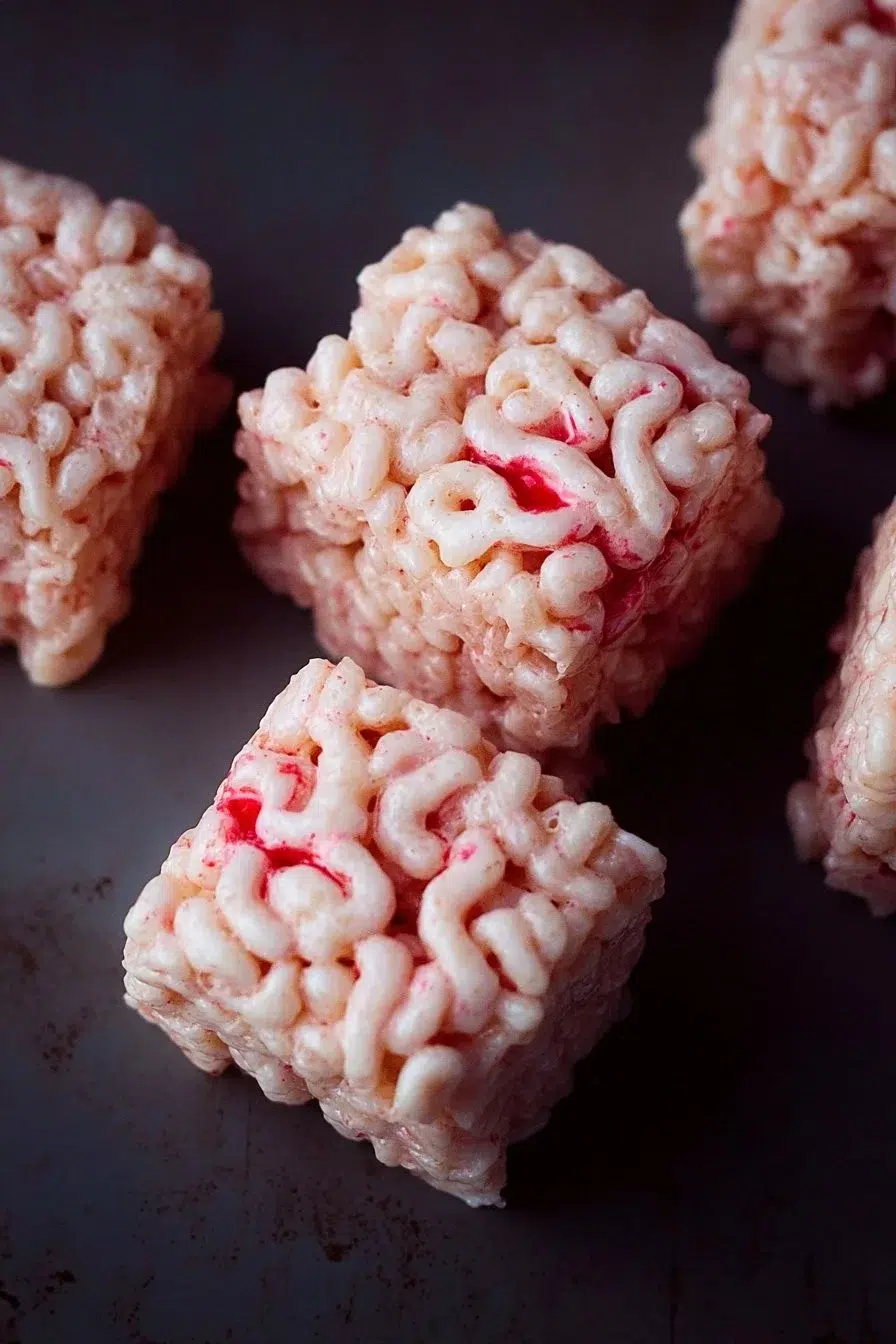
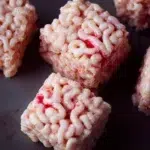
- Shape the Brains: Lightly oil your hands to prevent sticking and grab portions of the mixture. Shape them into oval brain forms. To add realism, carve a groove down the center with a butter knife, giving it that authentic brain look.
- Add the Details: Finally, use a toothpick dipped in more red food coloring to draw realistic vein patterns on your Marshmallow Rice Krispies Halloween Brains. The kids love this part! Their creativity shines as they design their spooky brains.
How to Serve Marshmallow Rice Krispies Halloween Brains
These spooky treats are best served at room temperature. You can present them on a large platter, making it a centerpiece for Halloween gatherings. To add a fun twist, Amelia often pairs them with ghoulish decorations like fake spider webs or serves them alongside other treats as part of a Halloween party spread.
Make sure to encourage your kids to get involved in the presentation. They can even practice their art by drawing spooky faces on the plate or around the treats for an added festive flair.
How to Store Marshmallow Rice Krispies Halloween Brains
If you find yourself with leftovers (a rarity in the West household!), store your Marshmallow Rice Krispies Halloween Brains in an airtight container. Place a piece of wax paper in between layers to prevent sticking. They keep well at room temperature for about 3-5 days. That said, Amelia insists that they taste best when made fresh and consumed quickly, so gather your family and enjoy!
Tips to Make Marshmallow Rice Krispies Halloween Brains
- Use Quality Ingredients: High-quality marshmallows and fresh butter make a difference in flavor. Amelia loves using a local brand for both ingredients, supporting local businesses while ensuring the best taste.
- Color with Caution: Add food coloring gradually. You can always add more if you want a deeper red color, but it’s hard to lighten it once mixed.
- Vary the Decorations: Let creativity flow here! Use chocolate sauce, sprinkles, or candy eyes to make the brains extra spooky.
Variation
If you want to switch things up a bit, try swapping out half of the Rice Krispies with chocolate cereal for a darker version of the Marshmallow Rice Krispies Halloween Brains. The chocolate will add a rich depth and new texture that your family might enjoy! Additionally, using green food coloring for the brains or adding mini chocolate chips for “death spots” could enhance the spooky theme.
FAQs
1. Can I make these ahead of time?
Absolutely! You can prepare the Marshmallow Rice Krispies Halloween Brains a day or two in advance. Just store them in an airtight container to keep them fresh.
2. What if I don’t have a heatproof bowl?
If you don’t have a heatproof bowl for the bain-marie, you can melt the marshmallows and butter in a microwave-safe bowl. Heat on high in 20-second intervals, stirring in between until smooth.
3. Can I add other flavors?
Definitely! You can incorporate a splash of vanilla extract or even try flavored marshmallows, although that might change the color a bit. Just think creatively and let your imagination run wild!
As Amelia enjoys the fun of cooking with her children, the process of making Marshmallow Rice Krispies Halloween Brains symbolizes the heart of family cooking—a blend of creativity, joy, and simple ingredients that create lasting memories. So go ahead, gather your family, and whip up these delightful Halloween treats. Enjoy the process, cherish the spooky vibes, and make every bite memorable!
Marshmallow Rice Krispies Halloween Brains
Ingredients
Method
- Fill a medium saucepan with ½ cup water and bring it to a gentle boil. Place a heatproof bowl over the saucepan to create a bain marie for melting the marshmallows gently.
- Add the butter and marshmallows to the bowl. Stir slowly until they melt together.
- Once fully melted, remove the bowl from heat. Whisk in the salt and about 2-3 drops of red food coloring.
- Pour the melted marshmallow mixture over the Rice Krispies and stir quickly to coat the cereal evenly.
- Lightly oil your hands and shape portions of the mixture into oval brain forms. Carve a groove down the center for a realistic look.
- Use a toothpick dipped in more red food coloring to draw vein patterns on the Halloween brains.