
I thrive in my cozy kitchen, where our family’s heart beats strongest. Every recipe is a chance to teach my kids the magic of cooking and the joy of creating together. Each Halloween, my passion comes alive as we bake our signature Halloween Chocolate Chip Cookies—sweet little bites that capture the laughter, warmth, and memories we share every year.
Why Make This Recipe
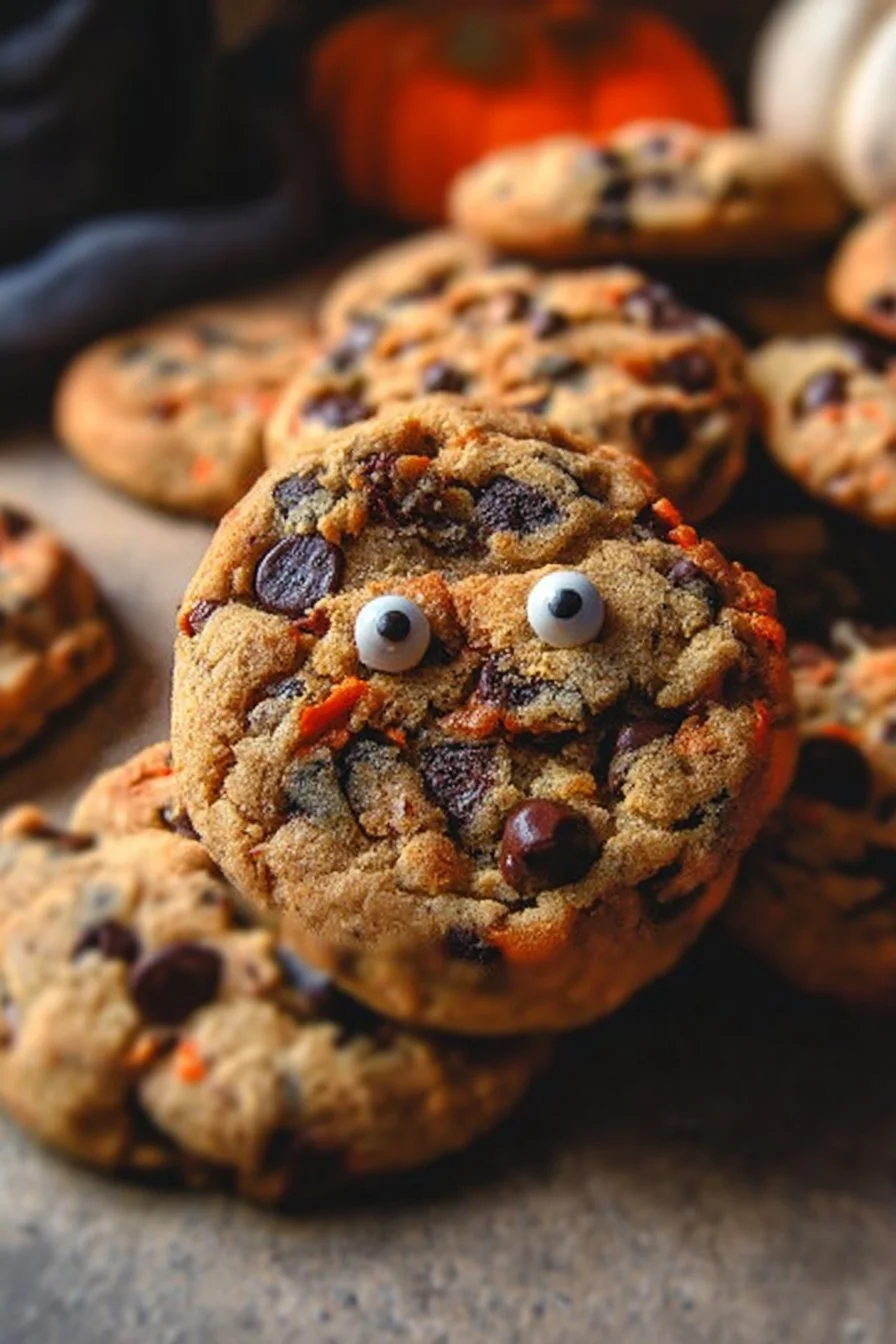
Halloween is a time for spookiness and fun, making it the perfect occasion to whip up something special in the kitchen. With Halloween Chocolate Chip Cookies, you can combine the classic, beloved chocolate chip cookie with a festive twist that captures the spirit of the season. These cookies are not just delicious; they also bring excitement to the table, thanks to the colorful Halloween sprinkles and playful candy eyes that add a whimsical touch.
Amelia’s children love being part of the baking process. The laughter and chatter that fills the kitchen are what make these cookies truly special. Whether it’s crafting spooky faces with candy eyes or measuring out sugary delights, these cookies become a collaborative family project. Sharing these delightful cookies with friends and neighbors creates a sense of community. So, if you’re looking for an easy and fun recipe to bring joy to your Halloween festivities, look no further!
How to Make Halloween Chocolate Chip Cookies
Creating Halloween Chocolate Chip Cookies is not only simple but also rewarding. This recipe is easy to follow, making it perfect for beginners and kids. Amelia always emphasizes that the best moments come from cooking together as a family. Now, let’s dive into the ingredients and the steps to create these delightful treats!
Ingredients:
- 1/2 cup unsalted butter (melted)
- 1/3 cup granulated sugar (67 g)
- 1/2 cup packed light brown sugar (100 g)
- 1 large egg
- 1 teaspoon vanilla extract
- 1/2 teaspoon salt
- 1/2 teaspoon baking soda
- 1 1/2 cups all-purpose flour (spooned and leveled, 186 g)
- 1 1/2 cups chocolate chips
- 1/2-3/4 cup Halloween sprinkles
- Candy eyes (optional)
Directions:
- Start by melting the butter. In a large mixing bowl, combine the melted butter with both the brown sugar and granulated sugar. Mix until smooth and creamy.
- Add in the egg and vanilla extract, continuing to mix until everything is well combined.
- In a separate bowl, whisk together the flour, salt, and baking soda. Gradually add this into the wet ingredients, mixing on low speed at first. Once combined, you can increase the speed and mix for another 15-30 seconds until the batter is smooth. Be sure not to over-mix!
- Gently fold in the Halloween sprinkles and chocolate chips using a spatula or large spoon. Mixing by hand helps maintain a chunky texture that kids love.
- Scoop out 2 tablespoons of dough and place them on a baking sheet lined with parchment paper. Don’t worry about spacing them apart just yet, as you’ll be chilling the dough to enhance their flavors.
- Cover the dough with plastic wrap and refrigerate for 1.5 to 2 hours, or up to 24 hours if you can wait that long!
- When you’re ready to bake, preheat your oven to 350℉ (175℃). Line another baking sheet with parchment paper.
- Place the chilled dough balls on the prepared baking sheet, spacing them about 2 inches apart.
- Bake your cookies for 11-13 minutes until the edges are golden brown. The centers will look a little soft—this is perfect for a chewy texture.
- If you’re using candy eyes, quickly press them into the warm cookies as soon as they come out of the oven.
- Allow the cookies to cool slightly on the baking sheet before transferring them to a wire rack to cool completely. Enjoy your spooky treats!
How to Serve Halloween Chocolate Chip Cookies
Serve these Halloween Chocolate Chip Cookies warm, right out of the oven, for that gooey, melted-chocolate experience! Set them on a festive Halloween platter alongside pumpkin-shaped candies and caramel corn for a delightful dessert table.
For a fun twist, consider serving them with a scoop of vanilla ice cream—homemade or store-bought. Kids enjoy making ice cream sandwiches with these cookies, making them a perfect way to celebrate the holiday. Wrapping a couple of cookies in colorful Halloween-themed bags can make charming party favors for trick-or-treaters or schoolmates.
How to Store Halloween Chocolate Chip Cookies
Place any leftover cookies in an airtight container at room temperature. They will stay fresh for about five days. If you want to keep them longer, consider freezing them. Simply place the cooled cookies in a freezer-safe bag or container and freeze for up to three months. When you’re ready to enjoy them again, let them thaw at room temperature or warm them up in the microwave for a few seconds.
Tips to Make Halloween Chocolate Chip Cookies
- Chill Your Dough: Chilling the dough is essential. This helps flavors meld together and prevents the cookies from spreading too much while baking. It’s one of Amelia’s favorite tips!
- Adjust the Sprinkles: Feel free to get creative! Use orange and black sprinkles or even mix in some festive Halloween candy pieces for extra sweetness.
- Mix It Up: Experiment with different types of chocolate chips—dark, milk, or even white chocolate for a unique twist!
Variation
If you want an extra fall flavor, consider adding a teaspoon of pumpkin spice to the dough. This adds an interesting, seasonal touch to your Halloween Chocolate Chip Cookies. You could also substitute half of the flour with oat flour for added texture and a bit of nuttiness.
FAQs
Can I use margarine instead of butter?
Yes, you can use margarine if you prefer. Just make sure it’s unsalted to keep the flavor balanced.
Can I make these cookies without eggs?
Yes! You can use a flaxseed meal replacement. Mix one tablespoon of flax meal with three tablespoons of water and let it sit for about five minutes to thicken. This works wonderfully as an egg substitute in many baking recipes.
How can I prevent my cookies from spreading too much?
Chilling the dough is the key! Make sure to chill for at least 1.5 hours. Also, adjusting your flour (adding a little more) can help if you find your cookies still spread too much.
Embracing the spirit of Halloween doesn’t have to come from spooky decorations alone. With Halloween Chocolate Chip Cookies, not only do you satisfy your sweet tooth, but you also create opportunities to bond as a family. As Amelia teaches her children the joy of baking, each cookie is a memory waiting to be savored. So gather your loved ones this Halloween, grab those ingredients, and let the cookie magic unfold!

Halloween Chocolate Chip Cookies
Ingredients
Method
- Start by melting the butter. In a large mixing bowl, combine the melted butter with both the brown sugar and granulated sugar. Mix until smooth and creamy.
- Add in the egg and vanilla extract, continuing to mix until everything is well combined.
- In a separate bowl, whisk together the flour, salt, and baking soda. Gradually add this into the wet ingredients, mixing on low speed at first. Increase the speed and mix for another 15-30 seconds until the batter is smooth. Be sure not to over-mix!
- Gently fold in the Halloween sprinkles and chocolate chips using a spatula or large spoon.
- Scoop out 2 tablespoons of dough and place them on a baking sheet lined with parchment paper. Cover the dough with plastic wrap and refrigerate for 1.5 to 2 hours, or up to 24 hours.
- Preheat your oven to 350℉ (175℃) and line another baking sheet with parchment paper.
- Place the chilled dough balls on the prepared baking sheet, spacing about 2 inches apart.
- Bake your cookies for 11-13 minutes until the edges are golden brown. The centers will look a little soft.
- If using candy eyes, press them into the warm cookies just as they come out of the oven.
- Allow the cookies to cool slightly on the baking sheet before transferring them to a wire rack to cool completely.