

I have such fond memories of Halloween in our home. Every year, as the leaves turned fiery shades of red and gold, my children, Oliver and Lily, would bounce with excitement. The days leading up to Halloween were filled with planning their costumes, carving pumpkins, and, of course, baking treats! Creating special recipes during this time has almost turned into our own little family tradition, one that binds us together through shared laughter and flour-covered counters.
One sunny October afternoon, as the wind rustled the leaves outside, I decided it was the perfect time to experiment with something festive and fun. I gathered my kids in the kitchen, ready for a delightful baking session. I wanted to try making HALLOWEEN CRINKLE COOKIES. The idea of creating these spook-tacular treats with vibrant colors drawn from gel food coloring would surely thrill them. As we got to work, the warmth of family filled our home.
Lily eagerly poured the cocoa powder, while Oliver carefully whisked it with the flour, baking powder, and salt. I watched their little hands work their magic, their giggles echoing above the soft sound of the mixer as I combined the wet ingredients. The kitchen soon filled with a rich chocolate aroma, and I couldn’t help but smile at the thought of sharing these delightful creations with our neighbors.
As the cookies baked, the excitement surged. We rolled the dough balls in powdered sugar, transforming them into mysterious orbs ready for the oven. Once they emerged, cracked and soft, they were like little Halloween gems. Each cookie was a delicious reminder that these simple moments spent baking with my children would create memories they would cherish forever.
Why Make This Recipe
The charm of HALLOWEEN CRINKLE COOKIES lies not just in their festive appearance but also in their delightful flavor. Soft, chewy, and full of rich chocolate goodness, they capture the spirit of Halloween in the best way. Baking these cookies is a wonderful way to engage children in the kitchen, fostering their creativity and love for cooking.
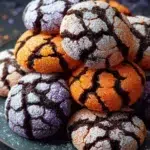
Moreover, I love how versatile these cookies can be! By using different gel colors, you can create a variety of designs: orange for pumpkin, purple for a spooky night, or black for a bit of mystery. The joy on my children’s faces when they see the colorful cookies filled our home with the spirit of Halloween. So whether you’re getting ready for a school party, a neighborhood gathering, or even just a cozy evening at home, these cookies are the perfect treat to share.
How to Make Halloween Crinkle Cookies
Ingredients:
- 1 cup all-purpose flour (or 1:1 GF blend)
- ½ cup unsweetened cocoa powder
- 1 tsp baking powder
- ¼ tsp salt
- 1 cup granulated sugar
- ¼ cup vegetable oil (or melted coconut oil)
- 2 large eggs (room temp)
- 1 tsp vanilla extract
- Gel food coloring (orange, purple, or black)
- ½ cup powdered sugar (for rolling)
Directions:
- Mix dry ingredients: In a medium bowl, whisk together the flour, cocoa powder, baking powder, and salt.
- Mix wet ingredients: In a large mixing bowl, beat together the granulated sugar, vegetable oil, room temperature eggs, and vanilla extract until smooth. Add a few drops of gel coloring, depending on your desired color.
- Combine mixtures: Gradually stir the dry ingredients into the wet mixture until just combined. You don’t want to over-mix; a few lumps are okay!
- Chill the dough: Cover the dough and refrigerate for at least one hour, or if you’re short on time, you can place it in the freezer for 30 minutes.
- Prep the oven: Preheat your oven to 350°F (175°C). Line baking sheets with parchment paper.
- Shape the cookies: Roll the chilled dough into balls about 1 tablespoon in size. Roll each ball generously in powdered sugar until well coated.
- Bake: Place the cookies about 2 inches apart on the prepared baking sheets. Bake for 10-12 minutes, until they crack but remain soft in the center.
- Cool: After baking, let the cookies sit on the baking sheet for about 5 minutes before transferring them to a wire rack to cool completely.
How to Serve Halloween Crinkle Cookies
To serve these HALLOWEEN CRINKLE COOKIES, pile them on a colorful Halloween-themed plate, and watch your family delight as they choose their favorites. You can pair them with a glass of cold milk, hot cocoa, or even a festive pumpkin spice latte. I love to arrange them in cute treat bags for the kids to share with friends or neighbors.
You can also use these cookies as part of a Halloween dessert table, along with other fun treats like spooky cupcakes and caramel apples. Each time the kids enjoy these cookies, I see their faces light up with joy, and that is the ultimate reward for me.
How to Store Halloween Crinkle Cookies
If there are any cookies left (which is unlikely!), you can store HALLOWEEN CRINKLE COOKIES in an airtight container. They last up to a week at room temperature. Just make sure they are completely cooled before packing them away to keep them soft and chewy. If you want to keep them longer, you can freeze them for up to three months. To thaw, simply leave them at room temperature for about an hour, and they’ll be ready to enjoy!
Tips to Make Halloween Crinkle Cookies
- Texture: For the best chewy texture, be careful not to overbake. Keep an eye on them as they bake to ensure they stay soft!
- Chilling time: Don’t skip the chilling step. It helps the dough firm up, making it easier to roll and shape the cookies.
- Gel food coloring: A little goes a long way! Start with just a drop or two, and you can always add more if you want a bolder color.
- Customize: Add festive sprinkles to the powdered sugar coating for an extra pop of color and fun!
Variation
For a unique twist, swap out the cocoa powder for peanut butter powder to create a rich peanut butter crinkle cookie. Just be sure to adjust the sugar levels if you prefer a sweeter cookie. You could also add chocolate chips or chopped nuts into the dough for added flavor and crunch!
FAQs
1. Can I use other flavors instead of chocolate?
Absolutely! While HALLOWEEN CRINKLE COOKIES typically have a chocolate base, you can experiment with different flavors. Try using pumpkin spice or even a cinnamon cookie base for a seasonal twist.
2. Can I make these cookies gluten-free?
Yes! You can substitute all-purpose flour with a 1:1 GF blend, and they will still turn out deliciously.
3. How can I make the cookies more festive?
You can add festive sprinkles to the powdered sugar, or use cookie cutters to shape the cookies. After they cool, drizzle melted chocolate on top or decorate with colored frosting!
Baking HALLOWEEN CRINKLE COOKIES with my children continues to be one of our favorite fall traditions. These cookies have brought us countless smiles, laughter, and of course, delicious bites! I hope that as you create these with your family, you find the same joy and warmth that we do. Happy baking, and may your Halloween be filled with delightful treats!
Halloween Crinkle Cookies
Ingredients
Method
- In a medium bowl, whisk together the flour, cocoa powder, baking powder, and salt.
- In a large mixing bowl, beat together the granulated sugar, vegetable oil, room temperature eggs, and vanilla extract until smooth. Add a few drops of gel coloring, depending on your desired color.
- Gradually stir the dry ingredients into the wet mixture until just combined. You don’t want to over-mix; a few lumps are okay!
- Cover the dough and refrigerate for at least one hour, or if you're short on time, place it in the freezer for 30 minutes.
- Preheat your oven to 350°F (175°C). Line baking sheets with parchment paper.
- Roll the chilled dough into balls about 1 tablespoon in size. Roll each ball generously in powdered sugar until well coated.
- Place the cookies about 2 inches apart on the prepared baking sheets. Bake for 10-12 minutes, until they crack but remain soft in the center.
- After baking, let the cookies sit on the baking sheet for about 5 minutes before transferring them to a wire rack to cool completely.