
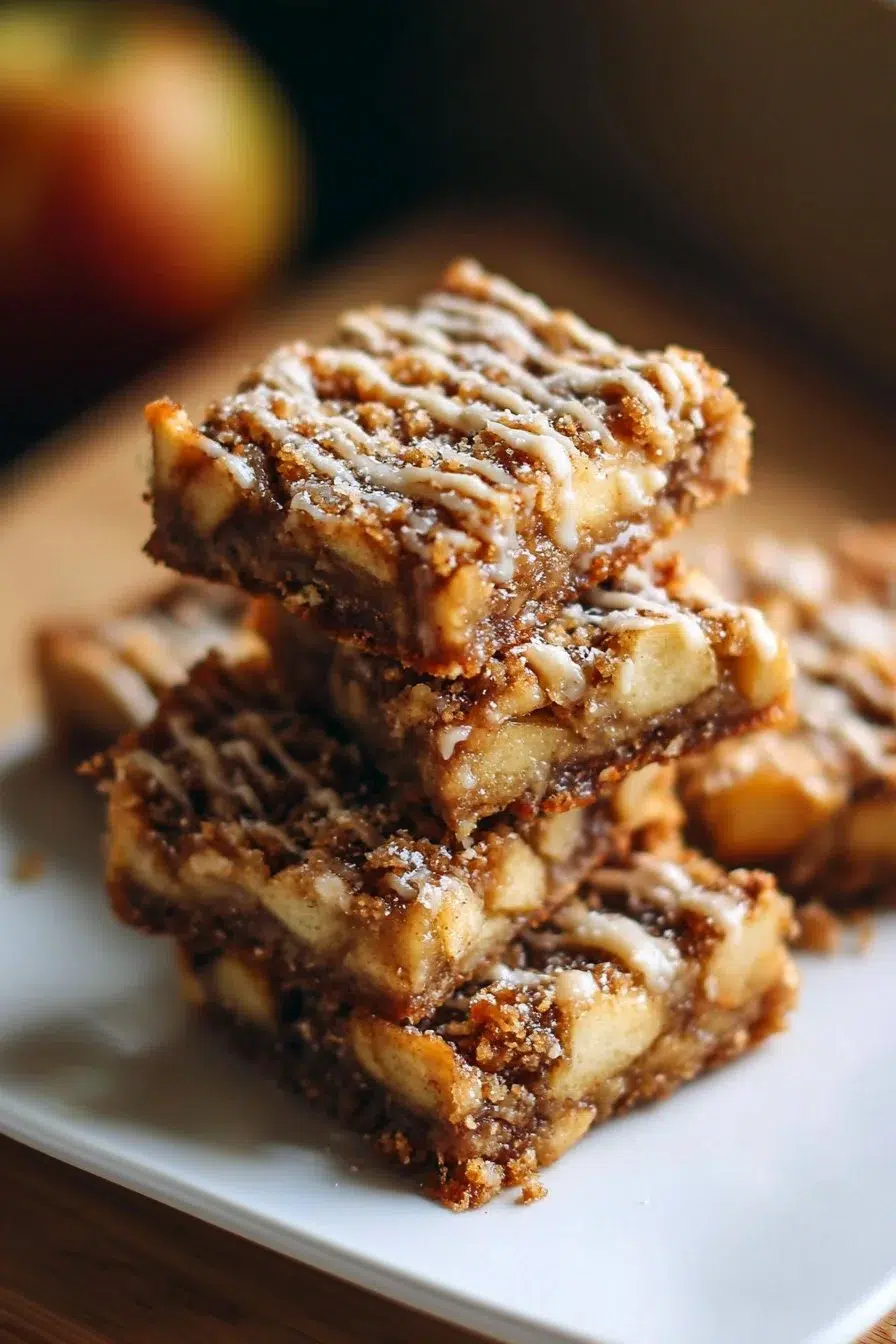
Apple Bars
I can still remember the sweet smell that filled my kitchen that late autumn afternoon. The leaves were dancing to the ground outside, and my children, Ella and Jake, were busy crafting leaf piles that reached their waists. My husband, Mark, had just come in from the garden, his cheeks flushed, wearing a big grin as he carried a basket overflowing with our backyard apples. It was one of those picture-perfect days that felt cozy and warm despite the chill creeping in from outside.
With the apples freshly picked, I felt inspired. Nothing says “fall” to me quite like the sweet and spicy aroma of baked apples wafting through the house. In that spirit, I gathered Ella and Jake with me in the kitchen, rolling up our sleeves, ready to whip up a batch of my favorite Apple Bars. As I pulled out the flour, oats, and sweet, cinnamon-spiced apples, I watched their faces light up with anticipation. Creating these bars would not only satisfy our craving for a warm dessert but would also turn storage apples into a treasured family treat.
Cooking has always been a bond for us – a joyful escape where laughter mixes with the clattering of pots and pans, where flour-mustached faces giggle at each other. It’s often the simple moments like these that I cherish the most. We were soon elbow-deep in flour and apple debris, my little helpers sorting out the ingredients with delight, while Mark added his commentary about how he used to make treats with his grandma. I thought, “There’s no better way to celebrate our family than creating something together.”
The resulting Apple Bars became a family staple, perfect for any gathering, from casual Saturday mornings to birthdays filled with friends. They are a delightful way to celebrate the changing seasons, and the best part? They’re simple to make.
Why Make This Recipe
If you’re looking for a comforting dessert that warms the heart and satisfies sugar cravings, these Apple Bars are your answer! They bring together the essence of autumn in every bite, offering a delightful balance of sweetness from the apples, a touch of spice, and a buttery crumble topping. Making these bars isn’t just about consuming them; it’s about creating memories in your kitchen.
The great thing about Apple Bars is their versatility. You can enjoy them as a dessert after meals, as an after-school snack with your kids, or even served warm with a scoop of vanilla ice cream on top. They’re perfect for winter gatherings or holiday celebrations, making them an all-season treat that you’ll want to keep coming back to. Plus, it’s a fantastic way to use up any of those apples sitting in your pantry.
How to Make Apple Bars
Ready to get started? Let’s gather our ingredients and dive right in!
Ingredients:
- 2 cups all-purpose flour
- 1 1/2 cups old-fashioned oats
- 1/2 cup granulated sugar
- 3/4 cup brown sugar
- 1 cup unsalted butter, cold and cubed
- 1/2 teaspoon salt
- 1 1/2 teaspoons ground cinnamon
- 1/4 teaspoon nutmeg (optional)
- 3 cups apples, peeled and chopped
- 1 tablespoon lemon juice
- 1 tablespoon cornstarch
- 1 teaspoon vanilla extract
- 1/2 cup powdered sugar
- 1–2 tablespoons milk (for glaze)
Directions:
- First, preheat your oven to 350°F and line a 9 x 13-inch pan with parchment paper. This makes for easier cleanup and helps your bars lift out nicely after baking.
- In a large bowl, mix together the flour, oats, granulated sugar, brown sugar, salt, and ground cinnamon. Then, cut in the cold, cubed butter until the mixture is crumbly. I often let the kids help with this part; they love using a pastry cutter or just their hands!
- Now, reserve 1 ½ cups of the crumb mixture to use as a topping later. Press the rest of the mixture firmly into the pan and bake it for about 10-12 minutes until it gets a little golden. The lovely scent should start filling your kitchen!
- In a separate bowl, toss your chopped apples with lemon juice, cornstarch, vanilla extract, cinnamon, and nutmeg if you prefer a bit of extra spice. This mixture will make the filling juicy and flavorful!
- Spread the apple mixture evenly over the baked crust, and then sprinkle the reserved crumb topping over the apples.
- Bake the assembled bars for 30-35 minutes or until they’re golden brown and bubbly.
- Allow the bars to cool completely in the pan before slicing them into squares. It takes a real act of patience for the kids not to dig in right away, but I always remind them the wait will be worth it!
- For the final touch, whisk together the powdered sugar and milk to create a simple glaze. Drizzle it over the cooled bars for that perfect finishing touch before serving.
How to Serve Apple Bars
Apple Bars are best enjoyed fresh out of the oven, but they are also delightful at room temperature. When serving, I like to cut them into neat squares and place them on a sunny platter. They are fantastic on their own, but grab a scoop of vanilla ice cream or a dollop of whipped cream if you want to elevate them further! You can even serve with a warm caramel drizzle for a touch of indulgence.
Ella and Jake love to pick their favorite bars and declare them the “best of the batch.” It’s always a fun little contest in our house!
How to Store Apple Bars
If, by some miracle, you have any leftovers (which we rarely do!), you can store Apple Bars in an airtight container. They will stay fresh for about 3-4 days at room temperature. You can also place them in the fridge for about a week if you want them to last longer. Just remember to bring them back to room temperature or warm them up slightly before indulging in those delights.
Tips to Make Apple Bars
- Apple Variety: Using a mix of sweet and tart apples can create a more complex flavor in your bars. I like to use Granny Smith apples combined with Honeycrisp for the perfect blend!
- Activity with Kids: Let your little chefs help peel and chop the apples. It’s a great way to teach them about cooking and being part of the family traditions.
- Cinnamon with a Twist: Feel free to experiment with other spices like cardamom or a dash of ginger for a fun twist on flavor.
- Seasoning Adjustments: If you’re not a fan of nutmeg, simply leave it out, and add a little extra cinnamon if desired.
Variation
If you want to change things up a bit, try adding some nuts like walnuts or pecans to the crumb topping for that added crunch. You can also drizzle chocolate over the bars or mix in raisins or cranberries with the apples for an exciting variation.
FAQs
What type of apples work best for Apple Bars?
I recommend using a mix of sweet and tart apples like Granny Smith and Honeycrisp for the best flavor. This gives your bars a delicious balance!
Can I make Apple Bars ahead of time?
Absolutely! You can prepare the bars a day in advance and store them at room temperature. Just remember to add the glaze right before serving.
Can I freeze Apple Bars?
Yes! You can freeze them in an airtight container for up to three months. To thaw, leave them in the fridge overnight.
Each time I make these Apple Bars, I’m reminded of the wonderful memories created in the kitchen with my family. From kitchen mishaps that turn into laughter to the joy of sharing a sweet treat that we all love, this recipe is forever a cherished part of our home. So go ahead and gather your loved ones in the kitchen. Let the warmth of baking bind you together, just as it does for us.
Apple Bars
Ingredients
Method
- Preheat your oven to 350°F (175°C) and line a 9 x 13-inch pan with parchment paper.
- In a large bowl, mix together the flour, oats, granulated sugar, brown sugar, salt, and ground cinnamon.
- Cut in the cold, cubed butter until the mixture is crumbly. Reserve 1 ½ cups of the crumb mixture for topping later.
- Press the remaining crumb mixture firmly into the pan and bake for about 10-12 minutes until slightly golden.
- In a separate bowl, toss the chopped apples with lemon juice, cornstarch, vanilla extract, cinnamon, and nutmeg (if using).
- Spread the apple mixture evenly over the baked crust.
- Sprinkle reserved crumb topping over the apples.
- Bake for 30-35 minutes or until they’re golden brown and bubbly.
- Allow the bars to cool completely in the pan before slicing into squares.
- Whisk together the powdered sugar and milk to create a simple glaze and drizzle it over the cooled bars before serving.